
Whether you’re a budding designer or a seasoned pro, understanding how to effectively merge layers in your graphic design software is essential.
Layer merging can enhance the quality and efficiency of your design process by allowing you to create complex compositions and manage file sizes.
If you’re new to Procreate, a digital illustration app for iPad, you might be wondering what some of the best techniques are for merging layers with this tool.
This post will walk you through three of the easiest ways to merge layers in Procreate.
But first, let’s look at why you should merge layers.
Why merge layers using Procreate?
Merging layers in your Procreate designs is a practical way to manage and edit your designs. Here are four of the main reasons to try it:
1. Create backgrounds
One of the fundamental uses of merging layers in Procreate is creating complex backgrounds. By merging various layers, you can combine different elements — such as colors, textures, and patterns — to create a cohesive background.
This technique is particularly useful in digital art and illustration, where backgrounds play a critical role in setting the tone and atmosphere of the artwork.
Merging layers ensures your background elements are seamlessly integrated, providing a solid foundation for the foreground elements to stand out.
2. Reduce file size
Each layer of your design adds to the file size, which can lead to slower performance and difficulty in sharing or exporting your work. Merging layers reduces the file size, making it more manageable.
For example, you might create images for a blog post that need to be compressed without compromising quality. In that case, you would create the graphics, consisting of different layers, and add the gradient or texture on top.
Then, you would merge and export them to PNG files so that when you lay out the visuals, they’re easier to move around, and the artboards won’t have slow loading times.
3. Organization
As your Procreate project grows in complexity, so does the number of layers. Managing dozens of layers can become overwhelming and confusing, making it difficult to navigate and make edits efficiently.
Merging related layers simplifies your layer panel, making it more organized and easier to work with and helping maintain clarity in your project.
This allows you to quickly find and adjust specific elements without sifting through a cluttered layer panel.
4. Workflow optimization
Merging layers in Procreate streamlines your workflow. By consolidating layers, you minimize the time spent toggling between different elements, which can be particularly time-consuming in detailed projects.
This optimization allows for a more focused approach to your design, where you can concentrate on refining and enhancing your artwork without getting bogged down by the technicalities of managing numerous layers.
Moreover, a streamlined workflow leads to faster completion times, which is especially important for professionals working under tight deadlines.
Merging layers in Procreate: the basics
Understanding the different types of layers and how to merge them is crucial, so let’s explore the basic types of layers in Procreate: Pixel layers, Vector layers, and Adjustment layers, and how they can be merged.
Pixel layers
Pixel layers are the most common type of layer in Procreate. These layers are made up of pixels — tiny squares of color that make up your image.
When you paint, sketch, or draw in Procreate, you’re typically adding pixels to a pixel layer. These layers are raster-based, which means they lose quality if resized significantly.
Merging pixel layers is straightforward — you can combine two or more pixel layers into a single layer, which is helpful for reducing the number of layers and blending elements seamlessly.
Vector layers
Unlike pixel layers, vector layers use mathematical equations to create shapes and lines, which means they can be resized without any loss of quality.
This is particularly useful for logos, text, and any design element that needs to scale up or down.
However, it’s important to note that Procreate’s primary focus is on raster graphics, and its vector capabilities are somewhat limited compared to dedicated vector software.
When you merge vector layers with other layers in Procreate, they are converted into pixel layers, which means they lose their scalability.
Adjustment layers
You can use adjustment layers in Procreate to apply non-destructive edits to your artwork, such as color adjustments, brightness/contrast changes, and other visual effects.
Adjustment layers affect all the layers below them without actually altering the original layers, allowing for a flexible editing process.
When you merge an adjustment layer with other layers, the adjustments become permanent on those layers.
This is a crucial step if you’re satisfied with the adjustments and want to consolidate them into your artwork.
Blend modes
Blend modes in Procreate change how a layer interacts with the layers beneath it. They can create a variety of effects, from subtle texture blending to dramatic color changes.
Each blend mode applies a different algorithm to the layer, affecting how its pixels blend with underlying pixels.
For instance, the ‘Multiply’ mode darkens colors, while ‘Screen’ mode lightens them.
Experimenting with different blend modes can lead to unique and unexpected results, greatly enhancing the depth and complexity of your artwork.
Opacity
The opacity setting in Procreate controls how transparent a layer is. By adjusting a layer’s opacity, you can make its contents partially see-through, allowing layers underneath to become more visible.
This feature is particularly useful for creating soft transitions, shadows, and overlay effects.
Lowering the opacity of a layer can also help you build up colors and textures gradually, giving you more control over the intensity and blending of your elements.
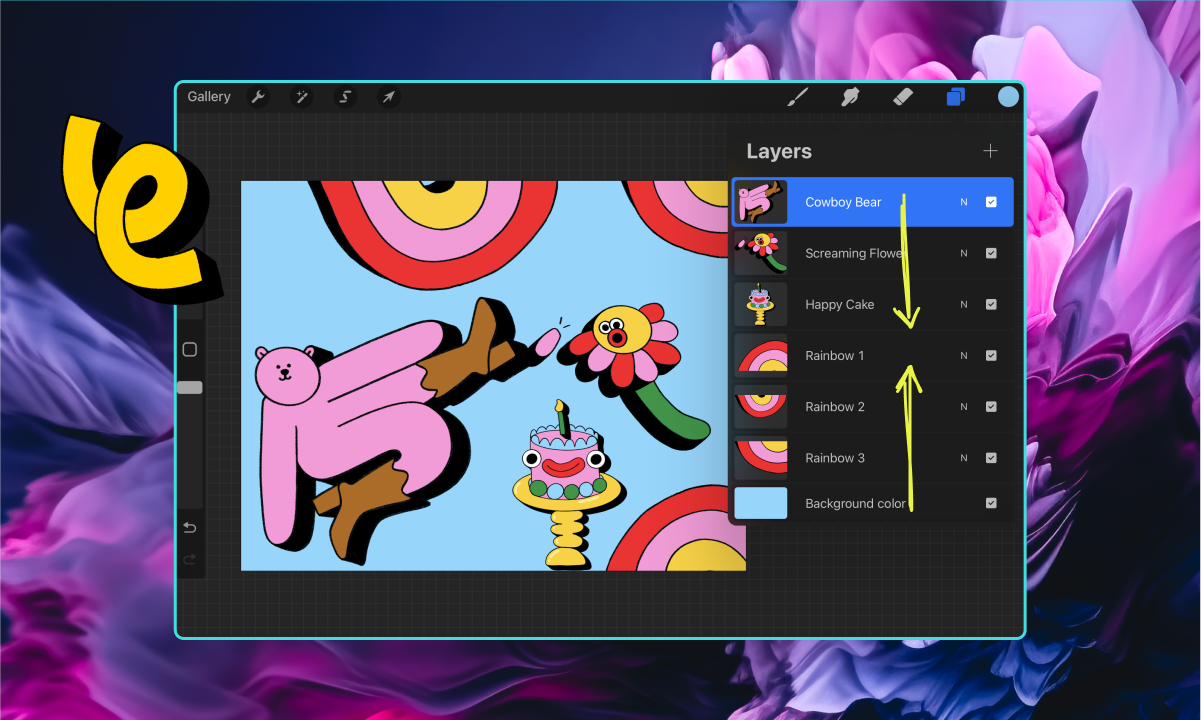
Layer order
Layer order, or the arrangement of layers in the layer stack, plays a critical role in how your artwork is composed. Layers in Procreate are arranged with the topmost layer in the stack appearing in front of all others.
You can easily drag layers to reorder them, which changes how they interact with each other.
Understanding layer order is essential for managing which parts of your artwork are visible and how different layers interact, especially when using blend modes and opacity adjustments.
Layer limits
Procreate sets a limit on the number of layers you can have in a single canvas, which varies depending on the device’s RAM and the dimensions of your canvas.
Higher-resolution canvases will have fewer layers available due to the increased memory required for each layer.
This layer limit encourages efficient layer management and prompts artists to merge layers thoughtfully to stay within these constraints.
It’s important to plan your layer usage, especially in complex projects, to ensure you don’t run out of layers before completing your artwork.
How to merge layers in Procreate
Remember, merging layers is irreversible once you close the app or undo your recent actions. To prevent any nasty surprises, save your work before closing the app or viewing the gallery in case you need to revert back to an earlier stage of your artwork.
That said, here are the three best methods for merging layers in Procreate.
Method #1: Merge Down
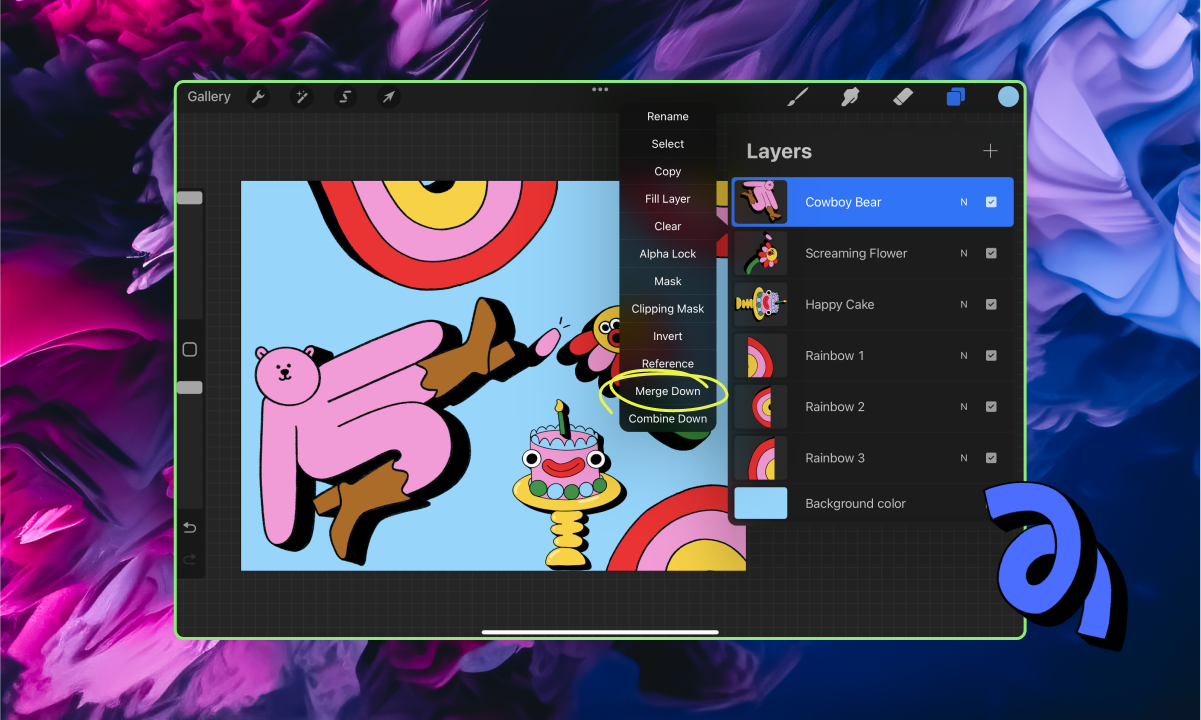
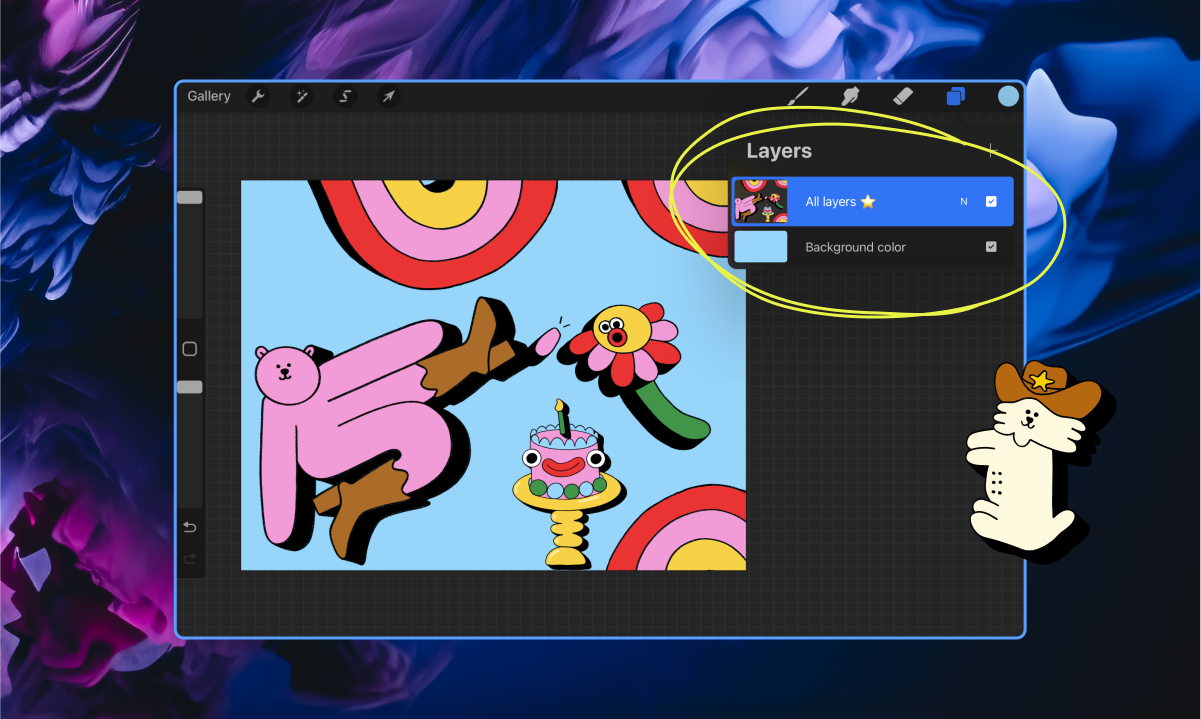
To merge layers with this method, open the ‘Layers’ panel in the top-right corner, tap on a layer to select it, then tap it again to access the ‘Layer Options’ menu.
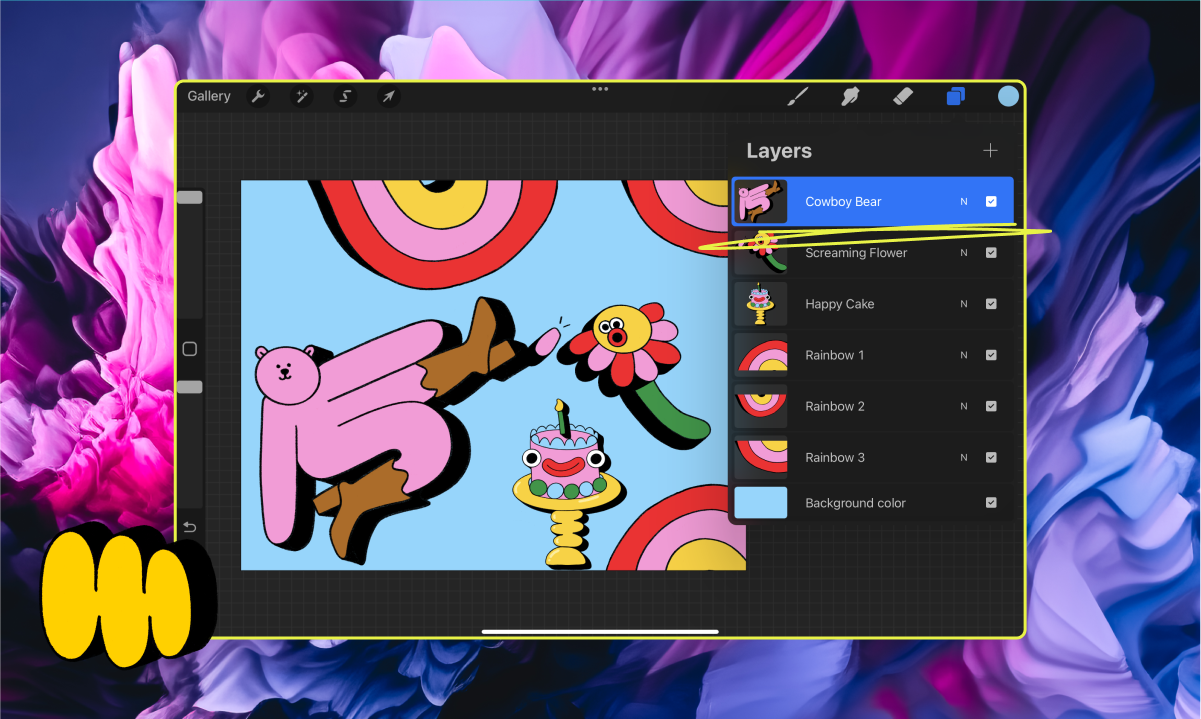
Choose ‘Merge Down’ to combine the selected layer with the one directly below it.
Method #2: Pinch
Pinch is a gesture-based control. To use it, open the ‘Layer Options’ menu and, using two fingers, pinch together on the layers you want to merge.
If you accidentally merge the wrong layers, you can use the ‘Undo’ gesture (two-finger tap) immediately to revert the action.
Method #3: Flatten
This is a good technique if you have a lot of layers to combine. First, select all the layers you want to merge and tap on ‘Group’ to combine them into a single group.
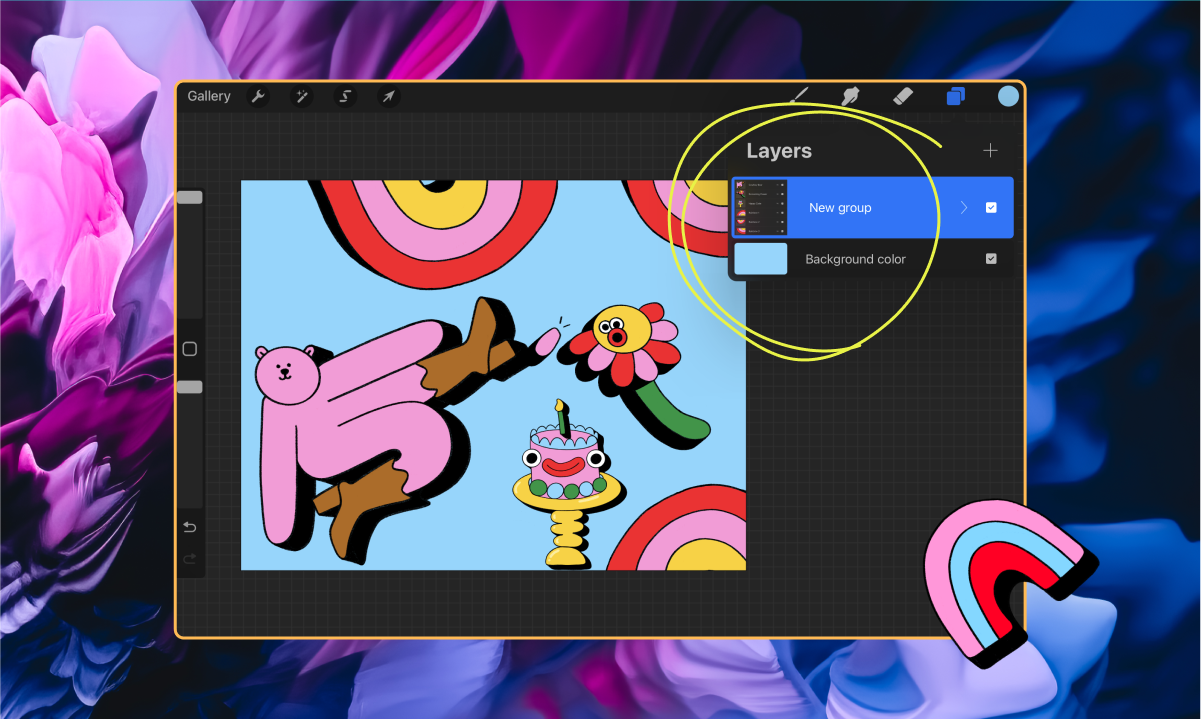
Tap on the new group to access the ‘Layer Options’ menu, then choose ‘Flatten’ to merge them all together.
Go forth and merge
Merging layers in Procreate is a strategic approach to making your design process more efficient, organized, and creative.
Whether you’re crafting intricate backgrounds, managing complex projects, or simply looking to optimize your workflow, understanding and using the layer merging technique is indispensable in digital design.
Ready to showcase your Procreate artwork? Create your portfolio with Playbook's templates today.
